


Pre-dive checks
A simplistic approach......
Άρθρο: Γιώργος Πέτρου
Photo: Greek Diver & HUE Archive
Αρθρογράφος/Φώτο: Γιώργος Πέτρου
Βασικοί έλεγχοι εξοπλισμού πριν την κατάδυση
Before every dive, we must check all our equipment from feet to head, from fins to hood, and not take anything for granted.
In every piece of equipment we should know from our training what to observe and check. A worn mask or fin strap, a worn O-ring…etc.
Στο άρθρο αυτό απλά και κατ ελάχιστα επισημαίνουμε μερικά σημεία στον καταδυτικό μας εξοπλισμό. O ουσιαστικός έλεγχος οφείλουμε να γίνεται προσεκτικά και σε λεπτομέρεια. Απαιτεί χρόνο, προσοχή και γνώσεις.
Diving is a fun hobby. We wouldn't want anything to spoil our enjoyment. But how many times have we not reached the beach and for some simple reason were we forced not to dive?
Very often such a reason is an O-ring or a gas leak from some point in our equipment.
That's why it's a good idea to look at some checks that we should do before diving that will help us to avoid canceling a dive as much as possible. Don't forget something that goes without saying, we NEVER dive knowing that there is a problem with our equipment.
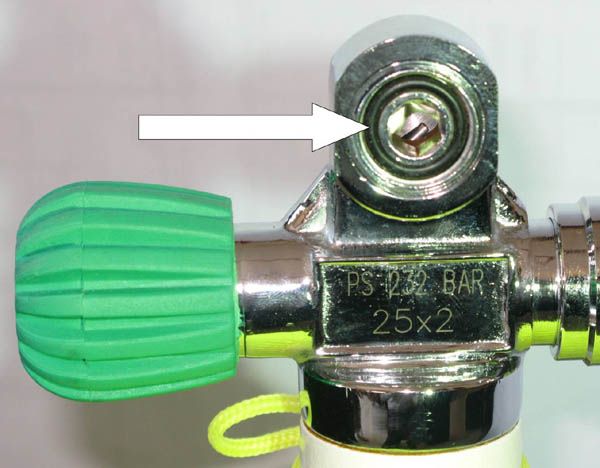
First of all, we check if there is an O-ring and its condition on the cap of our bottle. We remove it and check that it is not worn or cut. It is a good idea to replace the O-rings in our equipment often. In the case of the DIN type cap, there is no O-ring. We open and close the tap, which should move easily and without resistance.
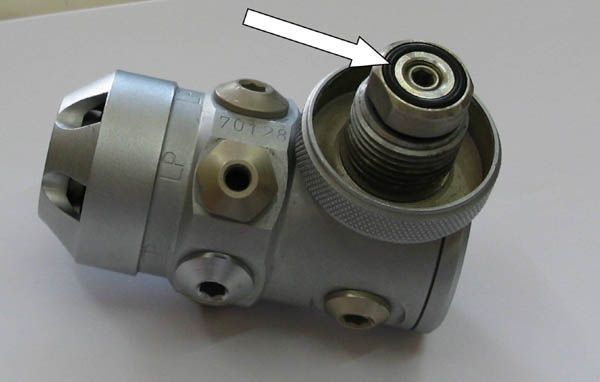
In case our closure is DIN type and there is no O-ring, then we must check the O-ring that is present in our DIN type pressure regulator. And this, like all O-rings, should not be worn and should have the necessary lubrication. By screwing the 1st Stage of our regulator into the bottle closure, we should feel that it screws easily and without resistance.
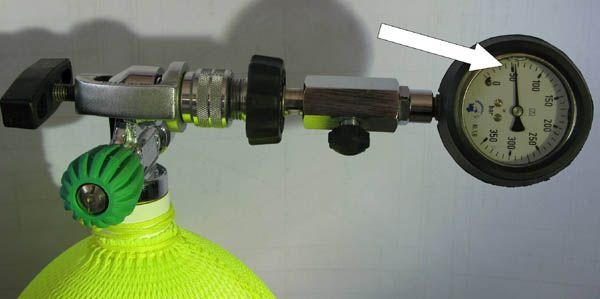
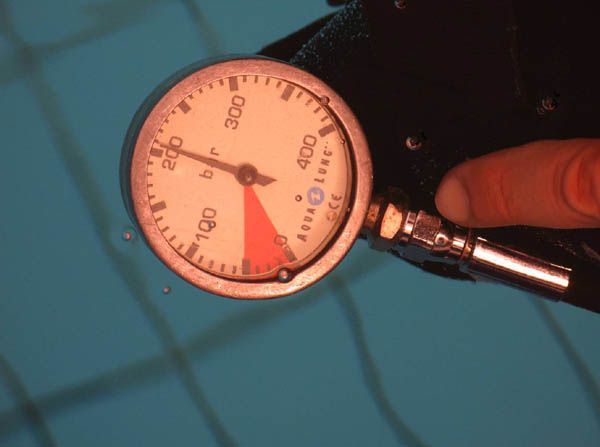
We install the pressure control manometer and make sure we have enough gas and what pressure we have. Too many times someone rents a tank, or takes the wrong tank (the tank they dived with the previous day) and arrives at the sea only to find out at the last minute that they do not have enough gas as the manometer shows low pressure. As a result, they lose their dive.
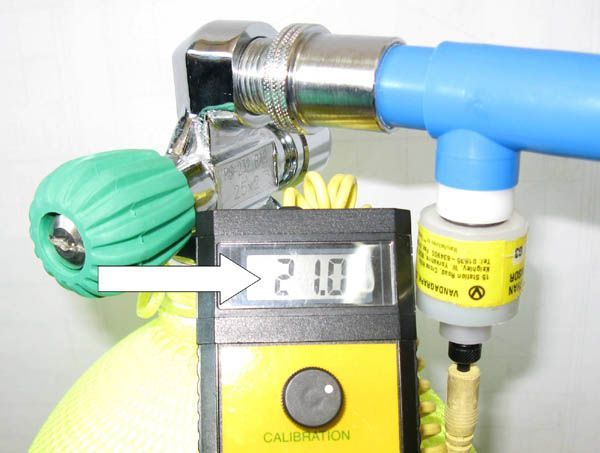
We check what mixture our tank contains. It is important since we are certified only for air and not for Enriched Air Nitrox to make sure that our tank is filled with air. Our analyzer reading should be 20.9 - 21%, with a correct gas flow procedure and a correctly calibrated analyzer. If we are certified for Nitrox, make sure of the % of the mixture.
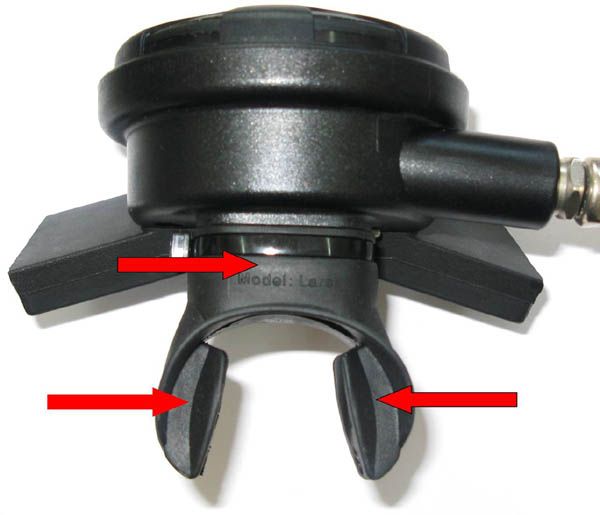
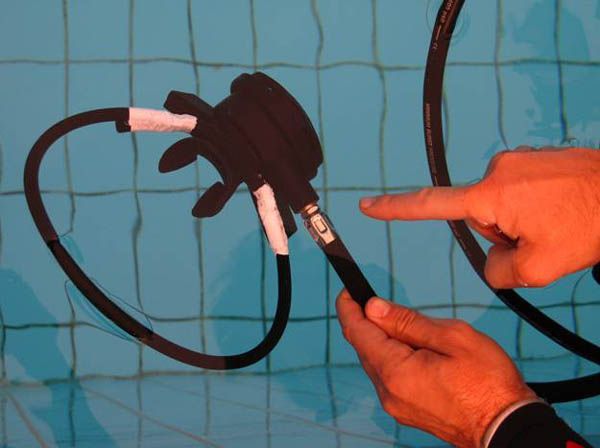
We check the mouthpiece of the 2nd stage of our regulator. The two main points are the point where our teeth touch, bite, and the point where the mouthpiece touches the plastic (or metal if it is a metal 2nd stage) of the pressure regulator. This is the point where the plastic clamp is also located.
Ελέγχουμε όλα τα O-ring των σωλήνων χαμηλής πίεσης του ρυθμιστή μας και βεβαιωνόμαστε ότι δεν είναι φθαρμένα. Πολύ σημαντικό να τα αντικαταστούμε συχνά. Προσέξτε και το σημείο που ενώνεται ο μεταλλικός σφικτήρας. Είναι σημείο που συχνά παρατηρείται απώλεια αερίου. Μόνον μέσα στο νερό μπορούμε να αντιληφθούμε ότι έχει πρόβλημα.
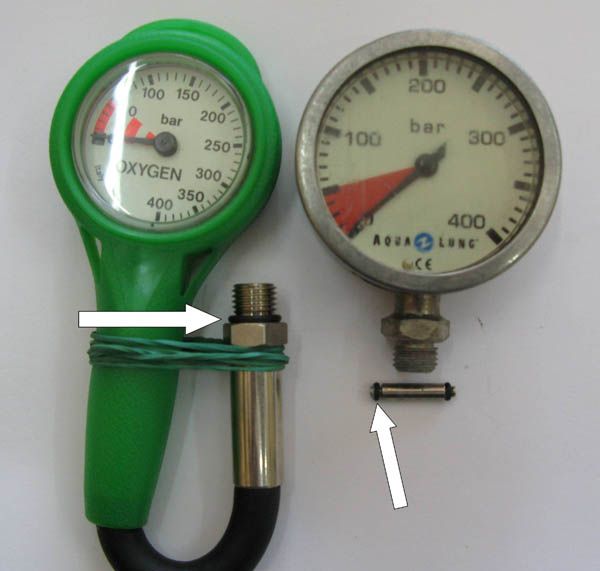
We especially check the O-rings of the High Pressure pipes. It is also important to remove the brass seat of the pressure gauge and check the small O-rings located there.
We check the valves of our Buoyancy Regulator. We check the point where it connects to the bag. We check the rubber disc for wear, we check the spring (e.g. for rust) and most clearly for the presence of sand. We must make sure that these are functioning optimally.
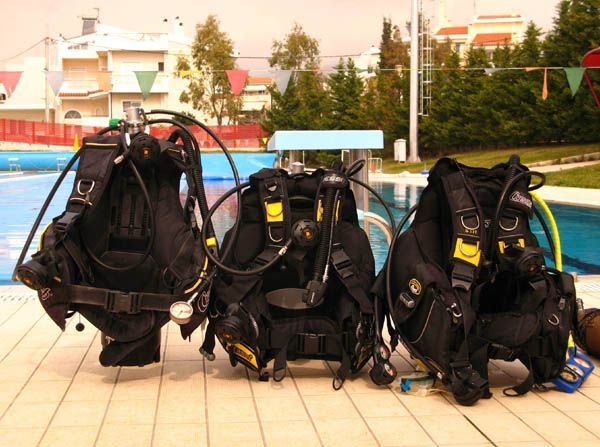
We assemble our equipment. Tank, pressure regulator, Buoyancy regulator. We open the shutter valve and check the pressure. We use the direct feed by inflating our bcd, it is important that it works correctly. That is, it puts air in sufficiently and does not have a constant supply. We breathe from the second stages.
Then we close the shut-off valve and leave the pressure inside our breathing system and our buoyancy regulator fully inflated. In 10 - 15 minutes we check a) the pressure on our manometer to see if it is the same. If it is, the news is good. If the pressure has dropped it means that we are losing gas from somewhere. b) if our buoyancy regulator is still inflated. If not it means that it is losing gas from somewhere.
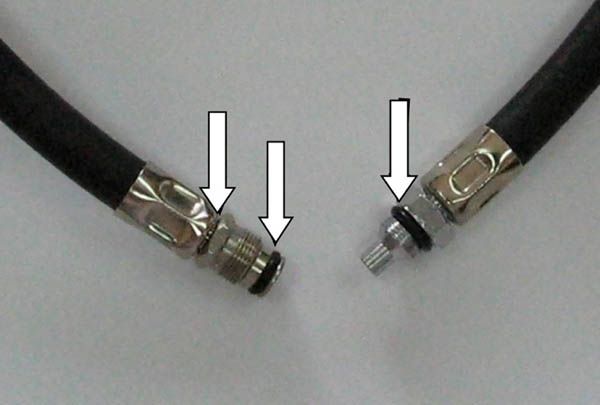
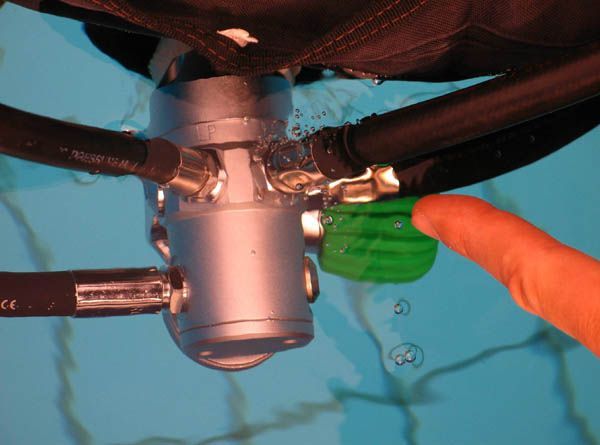
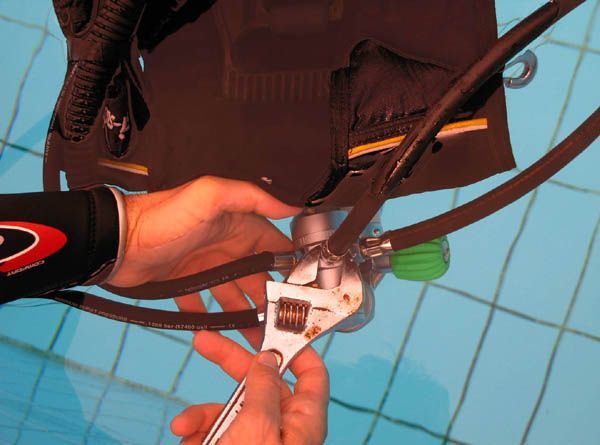
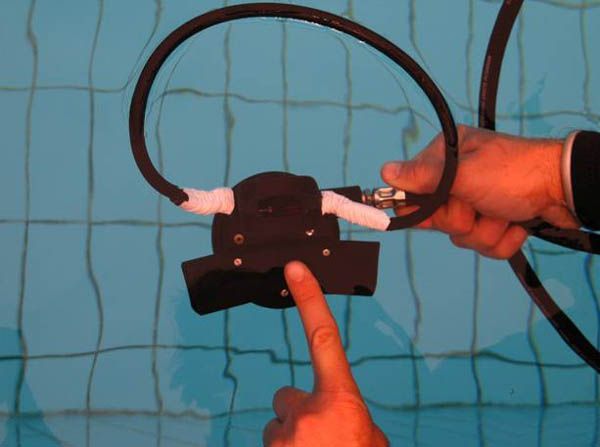
We then submerge our equipment with the pressure turned on and observe if we have bubbles coming out of any point. A possible point is the point where the low pressure pipes connect to the 1st stage of the pressure regulator.
Σε μια περίπτωση σαν την παραπάνω μπορούμε με ένα γαλλικό κλειδί να σφίξουμε ή να ξεσφίξουμε λίγο τον σωλήνα. Πολύ πιθανόν να σταματήσει η απώλεια αερίου και να σταματήσουν οι φυσαλίδες. Εάν όχι τότε οφείλουμε να βγάλουμε στην επιφάνεια το σύστημά μας, να ξεβιδώσουμε το σωλήνα και να αλλάξουμε O-ring, το οποίο πιθανότατα να φταίει.
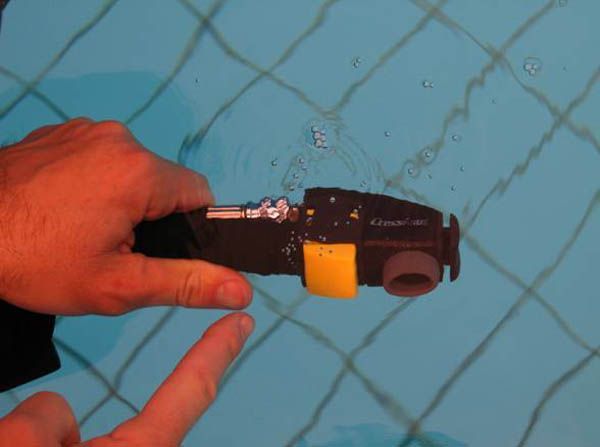
In the water, one point that we will check for bubbles is the point where the High Pressure hose connects to the pressure gauge.
Άλλο σημείο το οποίο θα ελέγξουμε για φυσαλίδες είναι το σημείο που ο σωλήνας Χαμηλής πίεσης ενώνεται με το Β' Στάδιο.
We check the second stage for bubbles from the mouthpiece and how sensitive it is for free flow.
We check our Direct feed for bubbles. Bubbles means = I need maintenance
Of course, there are many more checks we can do before diving. We mentioned some of them above. Don't forget that prevention is always the most important safety factor for our diving.
Publications

Share this